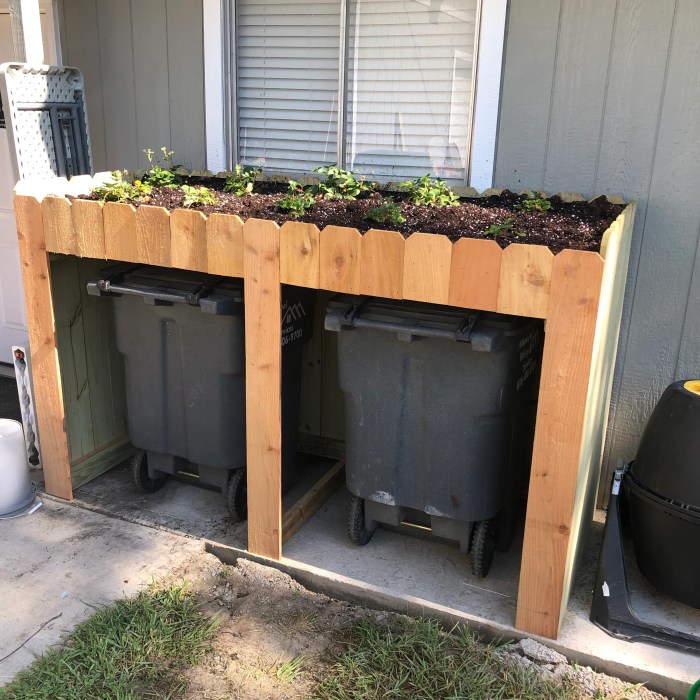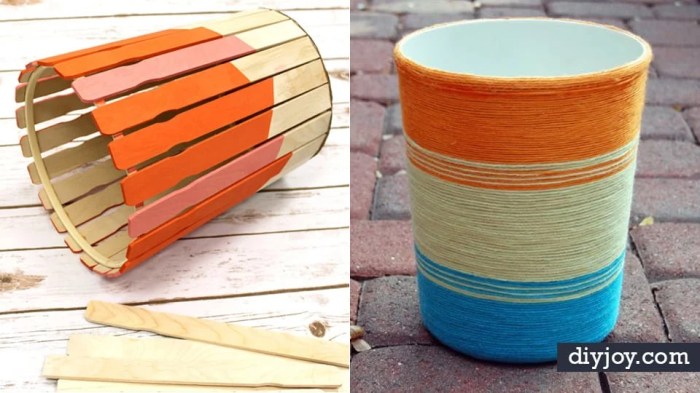
DIY Trash Can Bin: Upcycle and Personalize. Are you tired of the same old, boring trash cans? Do you wish you could have a trash can that reflects your unique style? Then why not try building your own DIY trash can bin? Not only is it a fun and rewarding project, but it also allows you to create a custom trash can that perfectly fits your needs and complements your home décor.
From repurposing old materials to crafting unique designs, the possibilities are endless. You can create a trash can that is both functional and aesthetically pleasing, using a variety of materials like wood, metal, plastic, or even fabric. Whether you’re a seasoned DIY enthusiast or a beginner, this guide will walk you through the process of creating your own DIY trash can bin, from planning and design to construction and customization.
Materials and Tools

The materials and tools needed for your DIY trash can bin project will vary depending on the design you choose. However, there are some common materials and tools that you’ll likely need for most projects.
This section will discuss common materials and tools used for DIY trash can bins.
Materials
Choosing the right materials for your trash can bin is important, as they will affect its durability, aesthetics, and overall functionality. Here are some common materials used in DIY trash can bins:
- Wood: Wood is a popular choice for trash can bins because it’s readily available, easy to work with, and can be stained or painted to match your decor. Some common wood choices include pine, plywood, and cedar.
- Metal: Metal trash cans are durable and long-lasting. You can use metal sheets, pipes, or even old metal containers to create your trash can bin. Some common metal choices include steel, aluminum, and galvanized steel.
- Plastic: Plastic is a lightweight and inexpensive material that can be used for trash can bins. You can use plastic containers, bottles, or even PVC pipes to create your trash can bin.
- Fabric: Fabric can be used to line the inside of your trash can bin or to create a decorative cover. You can use canvas, burlap, or even old curtains to create a unique and stylish trash can bin.
Tools
Having the right tools for the job will make your DIY trash can bin project much easier. Here are some essential tools that you’ll need:
- Saw: A saw is essential for cutting wood, metal, or plastic to size. You can use a handsaw, circular saw, or jigsaw, depending on the materials you’re working with.
- Drill: A drill is needed to create holes for screws, bolts, or hinges. You can use a cordless drill or a corded drill, depending on your preference.
- Hammer: A hammer is needed for driving nails, screws, or bolts. You can use a claw hammer or a rubber mallet, depending on the task at hand.
- Measuring Tape: A measuring tape is essential for accurately measuring and cutting materials.
- Screwdriver: A screwdriver is needed for driving screws and bolts. You can use a manual screwdriver or a power screwdriver, depending on your preference.
- Clamps: Clamps are useful for holding materials together while you’re working on them.
- Sandpaper: Sandpaper is used to smooth out rough edges and surfaces.
- Safety Glasses: Safety glasses are essential for protecting your eyes from flying debris.
Alternative Materials and Tools
If you’re looking for alternative materials or tools, there are plenty of options available. For example, you can use recycled materials like cardboard boxes, plastic jugs, or old tires to create your trash can bin. You can also use hand tools instead of power tools if you prefer. The key is to be creative and resourceful, and to choose materials and tools that are appropriate for your project.
Functionality and Features
A DIY trash can bin should be more than just a container; it should be a practical and efficient solution for waste management. By incorporating thoughtful features, you can significantly enhance its usability and make your life easier.
Lids
Lids are essential for containing odors and keeping pests away from your trash. A lid can also help prevent spills and keep your trash can looking neat. There are several lid options to consider:
- Swinging Lids: These are the most common type of lid, and they offer easy access to the trash can. Swinging lids can be hinged on the top or side of the can.
- Step-on Lids: These lids are activated by a foot pedal, allowing for hands-free operation. This is particularly useful for those who are busy or have limited mobility.
- Slide-out Lids: These lids are designed to slide open and closed, offering a smooth and effortless operation. They are often found on larger trash cans and can be helpful for those with limited upper body strength.
Handles, Diy trash can bin
Handles make it easy to move your trash can around, especially if it’s heavy or full. Handles can be placed on the sides, top, or bottom of the trash can. Consider the size and weight of your trash can when choosing the location and type of handle.
Wheels
Wheels are a great addition to a DIY trash can bin, especially if you have a lot of trash to carry or if you need to move it frequently. Wheels can be attached to the bottom of the trash can, and they should be large enough to roll smoothly over uneven surfaces.
Innovative Features
- Automatic Trash Compactor: These features use a mechanism to compress trash, reducing the amount of space it takes up. This is especially useful for smaller spaces or for those who generate a lot of trash.
- Built-in Odor Eliminator: This feature uses activated carbon or other odor-absorbing materials to neutralize unpleasant smells. This is a great option for those who are sensitive to odors or who live in a small space.
- Motion-activated Lid: This feature opens the lid automatically when it senses movement, providing hands-free operation. This is a convenient feature for those who are busy or who have limited mobility.
Troubleshooting and Maintenance: Diy Trash Can Bin

While DIY trash can bins are a great way to save money and add a personal touch to your home, they can sometimes present challenges. This section addresses common problems you might encounter during your DIY trash can bin project and provides tips for maintaining and repairing your creation.
Troubleshooting Common Issues
Troubleshooting can be a frustrating experience, but with the right information, you can overcome most challenges. Here are some common issues you might encounter during your DIY trash can bin project:
- Leaking: If your trash can bin is leaking, it could be due to a crack in the container, a loose seal, or a poorly-installed drain.
- To fix a crack, you can use epoxy resin or a sealant that is compatible with the material of your bin.
- If the seal is loose, tighten it or replace it with a new one.
- If the drain is the issue, you may need to re-install it or replace it with a new one.
- Uneven Lid: A lid that doesn’t close properly can be a nuisance. This could be caused by warped wood, misaligned hinges, or a poorly-constructed frame.
- For warped wood, you can try to straighten it with clamps or by applying heat.
- If the hinges are misaligned, you can adjust them or replace them.
- A poorly-constructed frame might need to be reinforced or rebuilt.
- Rust: If your trash can bin is made of metal, rust can be a problem.
- To prevent rust, apply a protective coating like paint or oil.
- If rust has already formed, you can remove it with sandpaper or a wire brush and then apply a protective coating.
Maintenance and Repair
Regular maintenance is crucial to extending the lifespan of your DIY trash can bin.
- Cleaning: Clean your trash can bin regularly to prevent the buildup of dirt, grime, and bacteria.
- Use a mild detergent and water to clean the inside and outside of the bin.
- For stubborn stains, you can use a baking soda paste or a commercial cleaner.
- Inspection: Regularly inspect your trash can bin for signs of wear and tear.
- Check for cracks, loose screws, or damaged parts.
- Repair any damage promptly to prevent further deterioration.
- Lubrication: If your trash can bin has moving parts, like hinges or a lid mechanism, lubricate them regularly to prevent them from seizing up.
- Use a light oil or grease to lubricate the moving parts.
- Avoid using too much lubricant, as this can attract dirt and grime.
Lifespan and Durability of Materials
The lifespan and durability of your DIY trash can bin will depend on the materials you use.
- Wood: Wood is a durable material that can last for many years with proper care. However, it is susceptible to moisture damage, so it’s important to seal it with a waterproof finish.
- Expect a lifespan of 5-10 years with proper care.
- Metal: Metal is a strong and durable material that can withstand heavy use. However, it can rust if not properly protected.
- Expect a lifespan of 10-20 years with proper care and protection from rust.
- Plastic: Plastic is a lightweight and easy-to-clean material, but it can be less durable than wood or metal.
- Expect a lifespan of 5-10 years, depending on the quality and thickness of the plastic.
Building a DIY trash can bin is a fulfilling project that allows you to express your creativity and add a personal touch to your home. With a little planning and effort, you can create a unique and functional trash can that you’ll be proud to display. So gather your materials, unleash your imagination, and get ready to transform your trash can into a work of art.
A DIY trash can bin can be a fun and rewarding project, especially if you want to add a unique touch to your space. You might even consider adding some led lights for diy to the inside of the bin for a cool and functional effect. Just be sure to choose lights that are safe for use around flammable materials, and you’ll have a stylish and practical trash can in no time.


