DIY shell art sets the stage for a captivating exploration of creativity and sustainability, inviting you to transform humble seashells into stunning works of art. This guide delves into the fascinating history of using shells in art, revealing their versatility and potential for diverse styles and projects.
From simple gluing techniques to intricate mosaic designs, shell art offers a range of possibilities for beginners and seasoned crafters alike. Discover inspiring examples, learn essential techniques, and unlock a world of creative expression with seashells as your canvas.
Inspiration and Design Ideas
The world of shell art is brimming with possibilities, offering a unique canvas for creativity. From simple arrangements to intricate mosaics, the beauty of shells can be harnessed to create stunning and personalized art pieces.
Shell Art Styles and Themes
A diverse range of styles and themes can be explored in shell art. Here are some examples:
- Coastal and Nautical: This style often features seashells in their natural form, arranged to evoke the feeling of the ocean, with elements like starfish, driftwood, and rope adding to the nautical theme.
- Abstract and Modern: Using shells of different shapes, sizes, and colors, artists can create abstract designs that are both visually appealing and thought-provoking. The use of negative space can also be incorporated to add depth and dimension.
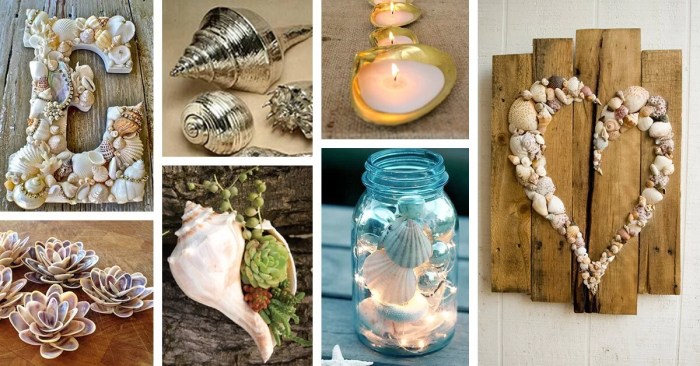
- Floral and Botanical: Shells can be used to create delicate flower arrangements, with different shell shapes and colors representing petals, leaves, and stems. The use of metallic paints or embellishments can add a touch of elegance.
- Animal and Wildlife: Shells can be used to create animal figures, with different shells representing different body parts. This style can be particularly effective when using shells of various colors and textures to depict realistic animal features.
Incorporating Other Materials
Combining shells with other materials can add texture, color, and depth to shell art projects. Here are some examples:
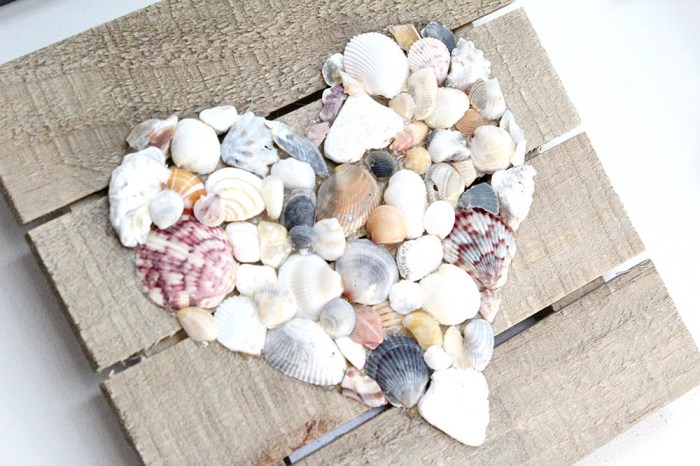
- Wood: Shells can be adhered to wooden surfaces like driftwood, creating beautiful wall art or decorative objects. The natural texture of wood complements the organic nature of shells.
- Fabric: Shells can be incorporated into fabric crafts, like wall hangings or pillow covers. This allows for the creation of unique and textured surfaces.
- Glass: Shells can be used in glass art projects, such as mosaics or stained glass windows. The transparency of glass allows the light to play on the shell surfaces, creating captivating effects.
Using Different Shell Shapes, Sizes, and Colors
The variety of shell shapes, sizes, and colors provides endless possibilities for creating unique designs. Here are some tips for incorporating these elements:
- Shape: Consider using shells of different shapes to create texture and dimension. For example, using flat shells for backgrounds and curved shells for accents.
- Size: Play with different shell sizes to create visual interest. Larger shells can be used as focal points, while smaller shells can be used to fill in gaps or create detail.
- Color: Shells come in a wide range of colors, from white to black to shades of pink, orange, and brown. Use these colors to create contrast and harmony in your designs.
Displaying and Preserving Shell Art: Diy Shell Art

Once you’ve created your shell art, you’ll want to display it proudly and protect it for years to come. Proper display and preservation techniques will ensure your artwork remains beautiful and in good condition.
Creating Attractive Displays
The way you display your shell art can significantly impact its visual appeal. Consider these tips:
- Use a variety of display methods: Don’t limit yourself to just one type of display. Experiment with different options like shadow boxes, wall shelves, or even a simple tray on a coffee table. You can even incorporate shells into other decorative items like candlesticks or vases.
- Play with color and texture: Think about how the colors and textures of your shells will interact with their surroundings. Use contrasting colors or textures to create visual interest. For example, a collection of white shells might look stunning against a dark wood background.
- Create a theme: A themed display can add a touch of elegance and cohesiveness to your shell art. You could focus on a specific region, a particular type of shell, or even a specific color scheme. A nautical theme, for example, could feature seashells, starfish, and driftwood.
- Add lighting: Proper lighting can enhance the beauty of your shell art. Use natural light or strategically placed lamps to highlight the intricate details of your shells. Avoid direct sunlight, as it can fade the colors of your shells over time.
Protecting Shell Art
Protecting your shell art from dust, moisture, and sunlight is crucial for preserving its beauty and longevity. Here’s how to do it:
- Keep it dust-free: Dust can accumulate on shells, dulling their shine and making them look dirty. Regularly dust your shell art with a soft, dry cloth or a feather duster. For more delicate pieces, you can use a small vacuum cleaner with a brush attachment.
- Protect from moisture: Moisture can damage shells, causing them to become brittle or discolored. Avoid placing shell art in humid environments, and ensure that any surfaces they’re displayed on are dry. If you live in a humid climate, consider using a dehumidifier in the room where your shell art is displayed.
- Avoid direct sunlight: Prolonged exposure to direct sunlight can fade the colors of shells. Display your shell art in a location that receives indirect sunlight or artificial light. If you must display it in direct sunlight, consider using a UV-resistant coating or a glass display case.
Framing, Mounting, and Showcasing
Framing, mounting, and showcasing your shell art can enhance its presentation and protect it from damage.
- Framing: Framing shell art can create a professional and polished look. Choose a frame that complements the style and colors of your artwork. Use a non-acidic mat board to prevent damage to the shells. Consider using a UV-resistant glass to protect the shells from fading.
- Mounting: Mounting your shell art can help prevent damage and create a more stable display. Use a non-acidic adhesive to attach the shells to a backing board. You can also use a variety of mounting techniques, such as using a wire hanger or a sawtooth hanger.
- Showcasing: There are many ways to showcase your shell art. You can create a dedicated display area in your home, or incorporate your shell art into existing decor. For example, you could use shells to decorate a mantelpiece, a coffee table, or a bookshelf. Consider using a display stand or a shadow box to showcase your shell art in a unique and eye-catching way.
Shell Art in Different Cultures

Shells have been a source of inspiration and material for art and craft traditions across the globe for centuries. From ancient civilizations to contemporary artists, shells have been incorporated into a diverse range of artistic expressions, reflecting cultural beliefs, traditions, and aesthetics.
Shells in Indigenous Art
Shells have played a significant role in the art and cultural practices of indigenous communities worldwide. These communities often view shells as sacred objects, imbued with spiritual significance and symbolic meaning.
- Native American Art: Native American tribes across North and South America have long used shells in their art and ceremonial objects. For example, the Navajo people used abalone shells to create intricate mosaics on jewelry and ceremonial masks, while the Hopi people incorporated seashells into their kachina dolls, representing ancestral spirits.
- Australian Aboriginal Art: Australian Aboriginal artists have incorporated shells into their rock art, body adornment, and ceremonial objects. The intricate designs created with shells often represent ancestral stories, geographic features, and spiritual beliefs.
- African Art: In many African cultures, shells are used in traditional jewelry, masks, and ceremonial objects. For instance, the Yoruba people of Nigeria use cowrie shells as currency, ornaments, and symbols of wealth and prosperity.
Shells in Ancient Civilizations
Shells have been used in art and craft traditions since ancient times. These civilizations often incorporated shells into their decorative art, jewelry, and religious objects.
- Ancient Egypt: Shells were highly valued in ancient Egypt, where they were used in jewelry, amulets, and decorative objects. For example, the scarab beetle, a symbol of rebirth and resurrection, was often crafted from shells.
- Ancient Greece and Rome: Shells were used in ancient Greek and Roman art and architecture. For instance, shells were incorporated into mosaics, decorative patterns on pottery, and even as architectural elements.
- Ancient Mesopotamia: Shells were used in ancient Mesopotamia for jewelry, ornaments, and religious objects. The use of shells in art and craft traditions during this period reflects the importance of these materials in their culture and beliefs.
Shells in Contemporary Art
Shells continue to inspire contemporary artists, who explore their unique textures, shapes, and colors in a variety of artistic mediums.
- Sculpture: Contemporary sculptors use shells as a material for creating intricate and expressive sculptures. For example, artist David Mach uses shells to create large-scale installations that explore themes of nature, fragility, and the environment.
- Jewelry: Shells are a popular material for contemporary jewelry designers, who create unique and eye-catching pieces that incorporate the natural beauty of shells. For example, artist Karen Kabat creates jewelry that combines shells with other materials like metal and gemstones.
- Mixed Media: Contemporary artists use shells in a variety of mixed media projects, incorporating them into paintings, collages, and installations. For example, artist Lisa Milroy uses shells to create intricate mosaics that explore themes of memory, time, and the passage of life.
Safety and Ethical Considerations
Creating beautiful shell art involves a responsibility to both the environment and your own safety. This section explores guidelines for safe handling and storage of shells, addresses ethical concerns related to shell collecting, and encourages responsible practices.
Safe Handling and Storage
Handling and storing shells safely is essential to prevent injury and preserve their beauty. Here are some important considerations:
- Wash shells thoroughly: Before working with shells, wash them with soap and water to remove any debris or organisms. This also helps prevent allergic reactions from certain species.
- Handle shells with care: Some shells have sharp edges or fragile structures. Handle them gently to avoid breakage or cuts.
- Store shells in a dry, cool place: Store shells in a dry, cool place to prevent mold and mildew growth. Use airtight containers or boxes to protect them from dust and insects.
- Avoid exposure to extreme temperatures: Extreme heat or cold can damage shells, so store them in a stable environment.
Ethical Considerations in Shell Collecting, Diy shell art
Shell collecting can have a significant impact on marine ecosystems. It’s crucial to be mindful of the following ethical concerns:
- Impact on marine life: Removing shells from their natural habitat can disrupt the ecosystem and negatively impact marine life that depends on them for food, shelter, or breeding grounds.
- Over-collection: Excessive collection can lead to a decline in certain shell species, disrupting the balance of the ecosystem.
- Protection of endangered species: Collecting shells of endangered or protected species is illegal and harmful to their survival.
Responsible Practices and Sustainable Alternatives
To enjoy shell art while protecting the environment, consider these responsible practices:
- Purchase ethically sourced shells: Support businesses that source shells sustainably and responsibly, ensuring they are not harming marine life.
- Collect only dead shells: Only collect shells that are already empty and have naturally washed ashore. Avoid disturbing living organisms.
- Consider alternative materials: Explore using other materials like beads, stones, or natural elements in your art instead of shells.
- Educate others: Share information about the impact of shell collecting and encourage responsible practices.
Embark on a journey of artistic discovery with DIY shell art, where the beauty of nature meets the power of human creativity. Let the intricate patterns and textures of seashells inspire you to craft unique and meaningful pieces, celebrating the wonders of the ocean and fostering a connection with the natural world.
DIY shell art is a fun and easy way to add a touch of the ocean to your home decor. You can create anything from simple picture frames to elaborate mosaics using shells you’ve collected on the beach. For another creative project, try your hand at DIY pasta crafts, where you can use pasta shapes to create unique and colorful designs.
Once you’ve mastered those, you can apply the same principles to your shell art, using different sizes and shapes to create a truly one-of-a-kind piece.


