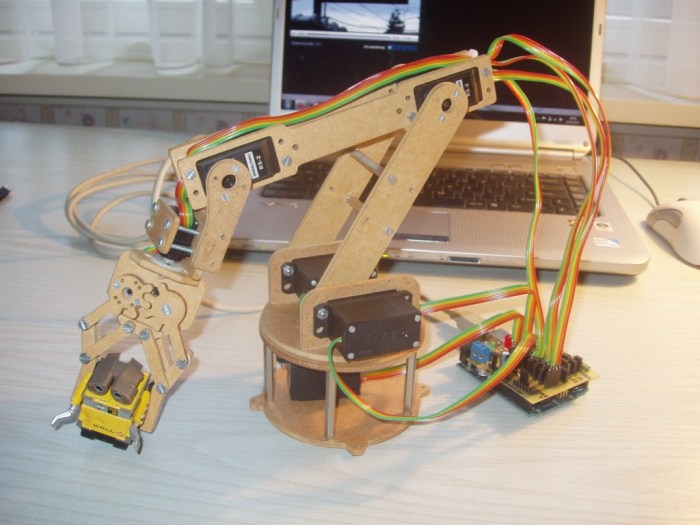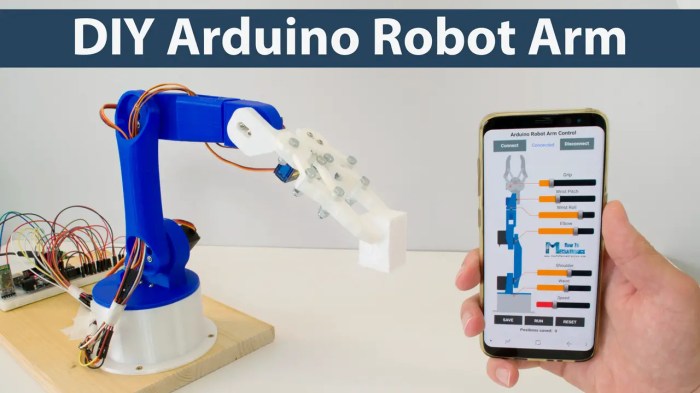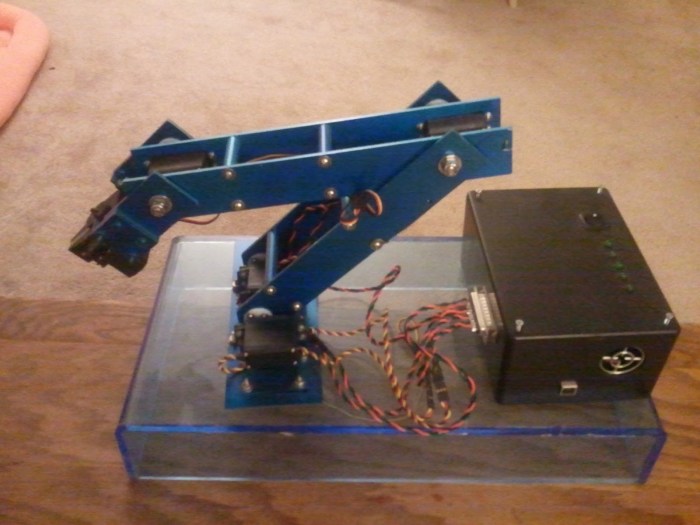
DIY robot arms offer a fascinating journey into the world of robotics, allowing you to build your own mechanical marvel from scratch. This hands-on experience provides a unique opportunity to explore the principles of mechanics, electronics, and programming, all while creating a functional and engaging project.
From basic concepts to advanced applications, this guide will walk you through every step of the process, from selecting the right components and designing your arm to programming its movements and discovering its potential in various real-world scenarios.
Introduction to DIY Robot Arms

Building a DIY robot arm is a rewarding experience that combines mechanics, electronics, and programming. You’ll learn how to design, build, and control a robotic arm, gaining valuable skills in various fields. This project provides a hands-on approach to understanding the fundamentals of robotics and how they translate into practical applications.
Types of Actuators in DIY Robot Arms
Actuators are the muscles of a robot arm, responsible for its movement. Various types of actuators are commonly used in DIY robot arms, each with its unique characteristics.
- Servos: Servos are rotary actuators that provide precise control over the angle of rotation. They are widely used in DIY robot arms due to their affordability, ease of use, and relatively high torque output. Servos typically operate with a pulse-width modulation (PWM) signal, where the duration of the pulse determines the desired angle.
- Stepper Motors: Stepper motors are another type of rotary actuator that moves in precise steps. They are often used in applications requiring high accuracy and repeatability. Stepper motors are controlled by a sequence of electrical pulses, with each pulse causing the motor to rotate a specific angle.
- Linear Actuators: Linear actuators provide linear motion, extending or retracting along a straight line. They are commonly used in robot arms for lifting, gripping, or moving objects. Linear actuators can be powered by various methods, such as electric motors, hydraulics, or pneumatics.
DIY Robot Arm Kits and Components

Building a DIY robot arm can be a rewarding and educational experience. You can choose from a variety of pre-made kits or source individual components to build your own custom robot arm.
DIY Robot Arm Kits
Pre-made kits offer a convenient and structured way to build a robot arm. They typically include all the necessary components, such as motors, sensors, and control boards, along with detailed instructions.
- Features: Kits often come with pre-programmed control software, making it easier to get started. They also typically include documentation and tutorials to guide you through the assembly process.
- Price: The price of kits varies depending on the complexity and features. You can find kits ranging from a few hundred dollars to several thousand dollars.
- Target Audience: Kits are ideal for beginners and hobbyists who are looking for a relatively easy way to get started with robotics.
Essential Components for DIY Robot Arm
If you prefer to build your own custom robot arm, you will need to source individual components. Here is a list of essential components:
- Motors: Servomotors are commonly used for robot arms. They provide precise control over the arm’s movements.
- Control Board: A microcontroller board, such as an Arduino or Raspberry Pi, is essential for controlling the motors and other components.
- Sensors: Sensors such as potentiometers or encoders can provide feedback on the arm’s position and movement.
- Structural Components: You will need materials such as aluminum, acrylic, or wood to construct the arm’s structure.
- Power Supply: A power supply is needed to provide power to the motors and other components.
- Tools: Basic tools such as screwdrivers, pliers, and a soldering iron are required for assembly.
Pros and Cons of Using Pre-made Kits vs. Sourcing Individual Components
- Pre-made Kits:
- Pros: Convenience, ease of assembly, detailed instructions, pre-programmed control software.
- Cons: Limited customization options, can be more expensive than sourcing individual components.
- Sourcing Individual Components:
- Pros: Greater customization options, potentially lower cost, opportunity to learn more about electronics and robotics.
- Cons: More complex to assemble, requires more knowledge of electronics and robotics, may require more time and effort.
Design Considerations for DIY Robot Arms
Designing a DIY robot arm involves careful consideration of several key parameters that will ultimately determine its functionality and performance. These parameters, such as degrees of freedom, reach, payload, and accuracy, must be carefully chosen to suit the specific application.
Degrees of Freedom
Degrees of freedom (DOF) refer to the number of independent movements a robot arm can make. Each joint in the robot arm contributes to its DOF. For example, a simple robot arm with a shoulder, elbow, and wrist joint would have 3 DOF. Increasing the DOF allows for greater flexibility and dexterity, but it also increases the complexity of the design and control system.
- More DOF: Allows for more complex tasks and greater versatility.
- Fewer DOF: Simpler design, easier to control, and less expensive to build.
The number of DOF required depends on the intended application. A simple pick-and-place robot arm might only need 3 DOF, while a more complex arm used for assembly or surgery might require 6 or more DOF.
Reach
Reach refers to the maximum distance the robot arm can extend from its base to its end effector. This is an important factor to consider when designing a robot arm, as it determines the workspace the arm can access.
- Longer reach: Allows the arm to access a larger workspace.
- Shorter reach: More compact design, less expensive to build, and may be more suitable for smaller workspaces.
The reach of the arm is determined by the length of its links and the configuration of its joints. A longer reach may require longer and heavier links, which can increase the cost and complexity of the design.
Payload
Payload refers to the maximum weight the robot arm can lift and manipulate. This is another important factor to consider when designing a robot arm, as it determines the types of tasks the arm can perform.
- Higher payload: Allows the arm to lift heavier objects.
- Lower payload: Lighter and more agile design, less expensive to build, and may be more suitable for lighter tasks.
The payload capacity of the arm is determined by the strength of its motors and the structural integrity of its links. A higher payload capacity will require stronger and heavier motors and links, which can increase the cost and complexity of the design.
Accuracy
Accuracy refers to the precision with which the robot arm can position its end effector. This is an important factor to consider when designing a robot arm, as it determines the quality of the tasks the arm can perform.
- Higher accuracy: Allows for more precise tasks, such as assembly or surgery.
- Lower accuracy: Simpler design, less expensive to build, and may be more suitable for tasks that do not require high precision.
The accuracy of the robot arm is determined by the resolution of its sensors and the precision of its motors and control system. Higher accuracy requires more precise sensors and motors, which can increase the cost and complexity of the design.
Design Trade-offs
When designing a DIY robot arm, it is important to consider the trade-offs between different design choices. For example, using lightweight materials can reduce the cost and complexity of the design, but it may also compromise the strength and payload capacity of the arm.
- Lightweight materials: Less expensive, easier to move, but may be less durable.
- Heavy materials: More expensive, heavier, but more durable and can handle heavier payloads.
It is important to choose the right balance of design parameters to meet the specific requirements of the application.
Simple 3D Model
A simple 3D model of a DIY robot arm can be created using free software like Tinkercad or Fusion 360. The model can be used to visualize the design and explore different configurations. It can also be used to create 3D printed parts for the robot arm.
“A 3D model can help to visualize the design and explore different configurations before actually building the robot arm.”
Applications of DIY Robot Arms

DIY robot arms, with their versatility and affordability, have opened up a wide range of applications across various fields. From automating tasks to enhancing educational experiences, these robotic arms are proving to be valuable tools in both professional and personal settings.
Automation
DIY robot arms are increasingly used for automating tasks in various settings, both at home and in industrial environments. They can perform repetitive actions with precision, freeing up human workers for more complex and creative tasks.
- Manufacturing: DIY robot arms can be used for tasks like pick-and-place operations, material handling, and assembly line work. They can also be used for quality control and inspection processes. For example, a DIY robot arm could be used to pick up and place components on a circuit board, or to inspect the finished product for defects.
- Agriculture: In agriculture, DIY robot arms can assist with tasks such as planting, harvesting, and sorting. They can also be used for precision spraying and weeding, reducing the need for manual labor and chemical use.
- Home Automation: DIY robot arms can be used for tasks like cleaning, cooking, and serving food. They can also be used for tasks like opening and closing blinds, turning on and off lights, and controlling appliances.
Education
DIY robot arms provide an engaging and hands-on way to learn about robotics, programming, and engineering principles. They allow students to experiment with different designs, control systems, and programming languages.
- STEM Education: DIY robot arms are a valuable tool for teaching STEM subjects in schools and universities. They can be used to demonstrate concepts such as mechanics, kinematics, and control theory.
- Robotics Clubs: DIY robot arms are popular among robotics clubs and enthusiasts, providing a platform for students to build, program, and compete with their own creations.
- Maker Spaces: DIY robot arms are often found in maker spaces, where individuals can experiment with new technologies and create innovative projects.
Research, Diy robot arm
DIY robot arms are being used in research projects across various fields, including medicine, space exploration, and environmental science. Their low cost and flexibility make them ideal for prototyping and testing new ideas.
- Medical Robotics: DIY robot arms are being used to develop new surgical tools and assistive devices for people with disabilities. They can also be used for research on human movement and rehabilitation.
- Space Exploration: DIY robot arms are being used to develop robots for space exploration, including tasks like collecting samples, repairing equipment, and building structures.
- Environmental Science: DIY robot arms are being used to study the environment, including tasks like collecting data, monitoring pollution levels, and cleaning up hazardous materials.
Hobby Projects
DIY robot arms are also popular among hobbyists and makers, who use them for a wide range of projects, from creating art to playing games.
- 3D Printing: DIY robot arms can be used to automate 3D printing processes, allowing for more complex and intricate designs.
- Art and Design: DIY robot arms can be used to create art and design projects, such as painting, drawing, and sculpting.
- Games and Entertainment: DIY robot arms can be used to create interactive games and entertainment systems.
Advanced DIY Robot Arm Projects
Building upon the foundational knowledge of DIY robot arm construction, this section delves into the realm of advanced projects, incorporating sophisticated features and functionalities. This involves integrating grippers, sensors, and advanced control systems, pushing the boundaries of what a DIY robot arm can achieve.
Advanced Components and Features
Advanced DIY robot arm projects often incorporate components and features that enhance their capabilities and functionality.
- Grippers: Grippers are essential for manipulating objects. These can range from simple parallel grippers to more complex designs like vacuum grippers or multi-fingered grippers. The choice of gripper depends on the specific tasks the robot arm is intended for.
- Sensors: Sensors provide the robot arm with information about its environment and the objects it interacts with. Common sensors include:
- Touch Sensors: Detect contact with objects, providing feedback for precise manipulation.
- Proximity Sensors: Detect the presence of objects without physical contact, enabling safe navigation and obstacle avoidance.
- Vision Sensors: Cameras or image sensors provide visual information, enabling the robot arm to identify and locate objects, and guide its movements accordingly.
- Advanced Control Systems: Advanced control systems allow for more precise and sophisticated control of the robot arm’s movements. This often involves using microcontrollers or embedded systems that can process sensor data and execute complex movement commands.
Microcontroller-Based Control
Microcontrollers like Arduino boards and Raspberry Pi are popular choices for controlling DIY robot arms. They offer a balance of processing power, ease of programming, and affordability.
- Arduino Boards: Arduino boards provide a straightforward platform for controlling servo motors, reading sensor data, and implementing basic control algorithms. Their ease of use and extensive community support make them ideal for beginners.
- Raspberry Pi: Raspberry Pi offers more processing power and versatility compared to Arduino boards. They can handle more complex control algorithms, including those involving machine learning and computer vision.
Computer Vision and Machine Learning
Integrating computer vision and machine learning algorithms can significantly enhance the capabilities of DIY robot arms.
- Object Recognition: Computer vision algorithms can enable the robot arm to identify and locate specific objects, allowing for tasks like picking and placing objects in a specific order.
- Motion Planning: Machine learning algorithms can be used to optimize the robot arm’s movement paths, minimizing time and energy consumption while ensuring smooth and efficient operations.
The world of DIY robotics is constantly evolving, and with every project, you gain valuable insights and skills that can be applied to future endeavors. Whether you’re a seasoned maker or a curious beginner, building a DIY robot arm is an exciting journey that combines creativity, technical knowledge, and a touch of futuristic wonder.
Building a DIY robot arm can be a rewarding project, but it’s not the only way to bring your creative ideas to life. If you’re looking for a more calming and visually appealing project, consider building an outdoor DIY fountain. The gentle sound of water and the mesmerizing dance of the water jets can create a peaceful atmosphere in your backyard.
Just like a robot arm, a DIY fountain requires careful planning and execution, but the satisfaction of seeing your creation come to life is well worth the effort.


