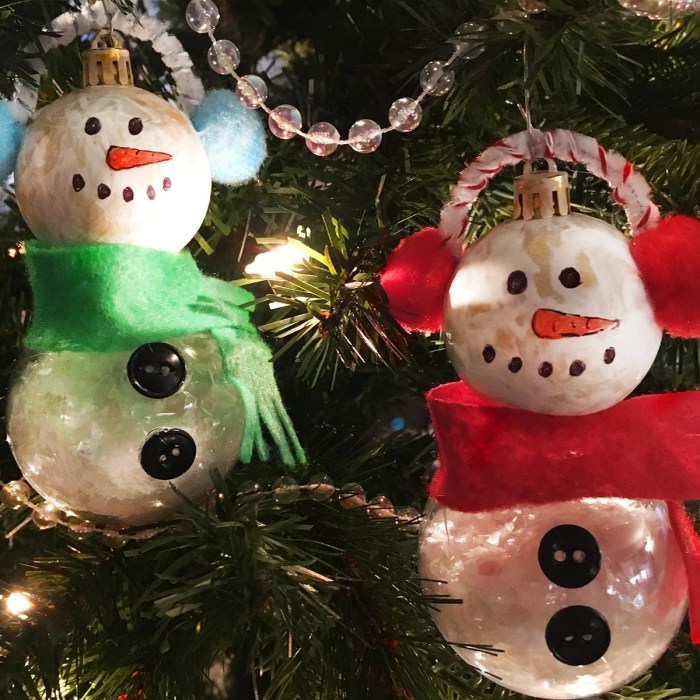
DIY snowman decorations offer a delightful way to personalize your winter wonderland and add a touch of whimsy to your outdoor space. From classic designs to whimsical creations, the possibilities are endless for crafting unique snowmen that reflect your personality and style.
Whether you’re a seasoned DIY enthusiast or a beginner looking for a fun winter activity, this guide provides step-by-step instructions and creative inspiration for crafting your own charming snowmen. From crafting festive faces to adding colorful accents, we’ll explore a range of ideas that will bring your snowman vision to life.
The Classic Snowman
The classic snowman is a beloved winter icon, symbolizing the joy and simplicity of the season. Its simple design, made from three snowballs stacked on top of each other, has captivated generations. This timeless figure is a testament to the creative spirit that flourishes during the winter months.
Building a Basic Snowman
Building a snowman is a fun and rewarding activity that can be enjoyed by people of all ages. Here’s a step-by-step guide to help you create your own winter masterpiece:
- Gather your materials. You will need a shovel, a hat, a scarf, buttons, and a carrot. Optional items include twigs for arms, coal for eyes and a mouth, and a broom for a prop.
- Roll your snowballs. Start by rolling a large snowball in the snow. Once it’s the desired size, roll a slightly smaller snowball, then a smaller one for the head.
- Stack the snowballs. Carefully place the largest snowball on the ground, then stack the medium snowball on top, and finally, place the head on top of the medium snowball.
- Decorate your snowman. Once the snowballs are stacked, it’s time to add the finishing touches. Use the carrot for a nose, buttons for eyes, and twigs for arms. Add a hat and scarf to complete the look.
Making a Snowman That Stands Tall and Sturdy
To ensure your snowman stands tall and sturdy, consider these tips:
- Choose a firm base. Build your snowman on a level surface, preferably on a patch of ground that is not too soft or too icy. This will provide a stable foundation for your snowman.
- Pack the snowballs tightly. As you roll the snowballs, press the snow down firmly to create a dense and compact structure. This will help to prevent your snowman from collapsing.
- Use a supporting structure. For extra stability, consider using a wooden dowel or a sturdy branch to support the middle snowball. Insert the dowel or branch into the bottom snowball and let it extend up through the middle snowball, providing a strong anchor for the head.
- Build in a sheltered location. If possible, position your snowman in a sheltered location, such as under a tree or near a building. This will help to protect it from strong winds and heavy snowfall.
Festive Faces
Giving your snowman a personality is all about the face! Get creative with different materials to bring your snowman to life.
Here are some ideas for creating different snowman faces using common materials:
Facial Expressions and Materials
The possibilities are endless when it comes to creating unique snowman faces. Here’s a table showing some basic facial expressions and materials you can use:
| Expression | Materials |
|---|---|
| Happy | Two black buttons for eyes, a small twig for a smile, and a red button for a nose. |
| Sad | Two black buttons for eyes, a small twig for a frown, and a grey button for a nose. |
| Surprised | Two large black buttons for eyes, a small twig for an open mouth, and a red button for a nose. |
| Sleepy | Two small black buttons for eyes, a small twig for a closed mouth, and a red button for a nose. |
| Winking | One black button for an eye, a small twig for a smile, and a red button for a nose. |
Creating Whimsical Facial Features
Don’t be afraid to experiment with different materials to create unique and whimsical facial features for your snowman.
DIY snowman decorations are a fun and festive way to bring winter cheer to your home. You can create unique and personalized ornaments using a variety of materials, from felt and buttons to twigs and pinecones. If you’re looking for a way to display your snowman creations, consider crafting a custom picture mat using the techniques found in this DIY picture matting guide.
With a beautifully framed snowman decoration, you’ll have a charming winter centerpiece that’s sure to impress your guests.
- Use colorful buttons for eyes to create a playful look.
- Try using small twigs or sticks to create eyebrows or even a mustache.
- For a more natural look, use acorns or pine cones for eyes and a small branch for a nose.
- Use a small piece of fabric or a felt scrap to create a hat for your snowman.
- Add a scarf made from a ribbon or a strip of fabric for a festive touch.
Colorful Accents
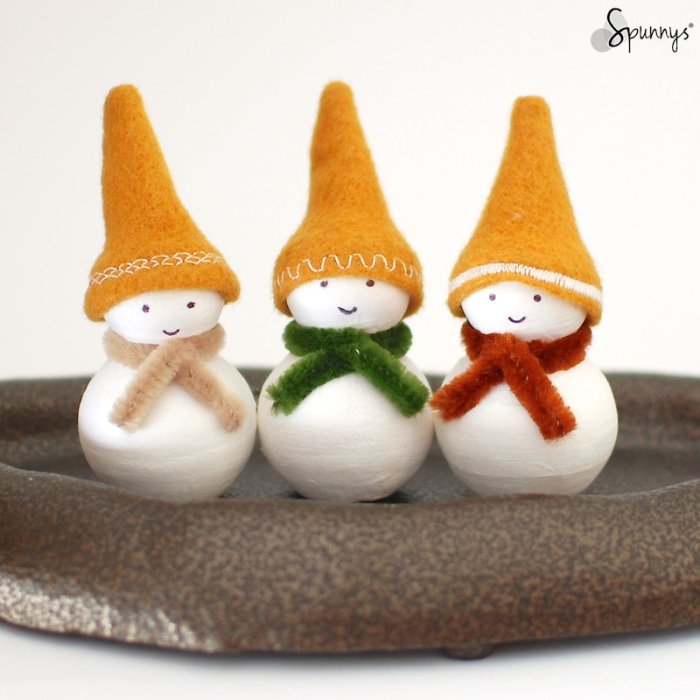
Adding pops of color to your snowman can transform it from a simple winter figure to a whimsical work of art. Think beyond the traditional black hat and scarf, and embrace a rainbow of possibilities.
Color Combinations and Moods
Color combinations can evoke different moods and personalities. Here is a table illustrating a few examples:
| Color Combination | Mood | Snowman Personality |
|---|---|---|
| Red and White | Bold and Festive | A cheerful and energetic snowman, perhaps a bit mischievous. |
| Blue and White | Calm and Serene | A gentle and peaceful snowman, maybe a bit shy. |
| Green and White | Natural and Fresh | A playful and adventurous snowman, always up for a good time. |
| Purple and White | Mystical and Magical | A wise and thoughtful snowman, perhaps a bit mysterious. |
Creative Arms and Hands
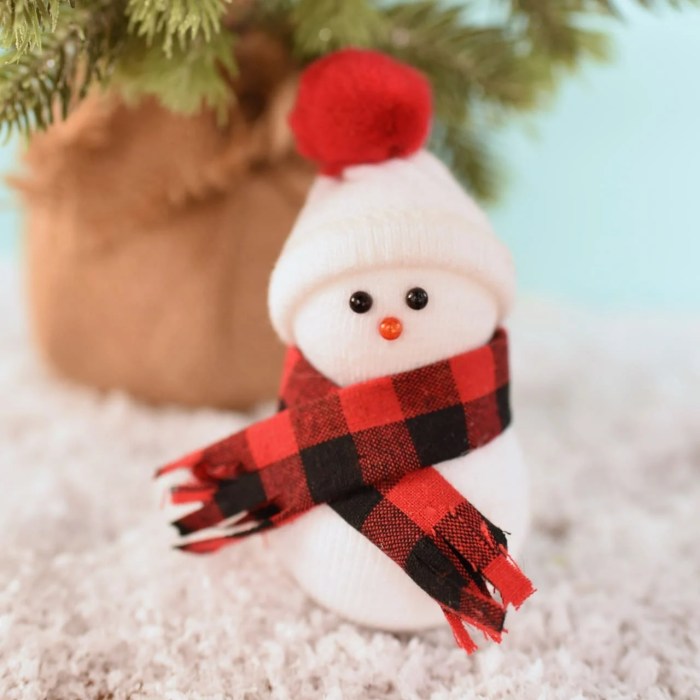
Giving your snowman arms and hands adds a touch of personality and whimsy. You can create unique poses and gestures that make your snowman stand out. Let’s explore some creative ideas for crafting snowman arms and hands.
Choosing Materials
The right materials are essential for creating durable and visually appealing snowman arms and hands. Here are some options:
- Branches: Branches from trees offer natural texture and a rustic look. Choose branches of varying thicknesses for different arm sizes and shapes.
- Sticks: Thin sticks can be used for creating fingers and smaller details. Look for sticks that are straight and smooth for easy manipulation.
- Twigs: Twigs can be used to create a more natural and textured look. They can be bundled together to form thicker arms.
- Wire: Wire is versatile and allows you to shape arms and hands into intricate designs. You can use wire to create a base and then wrap it with natural materials.
Designing Arm Poses and Hand Gestures
- Welcoming Arms: Create a classic welcoming pose by having the snowman’s arms outstretched with open hands.
- Hugging Pose: Position the arms slightly bent and inward, as if the snowman is giving a hug.
- Pointing Gesture: One arm can be straight out with a single finger pointing towards something, creating a fun and playful gesture.
- Holding a Prop: Consider having the snowman hold a small prop, like a broom, a hat, or a scarf, to add to its character.
Securing Arms and Hands
- Use Wire: Wrap wire around the base of the arms and hands, then twist the wire securely into the snowman’s body.
- Snowball Technique: Roll small snowballs and attach them to the snowman’s body. Then, insert the arms and hands into the snowballs for a secure fit.
- Hot Glue: Use hot glue to attach the arms and hands to the snowman’s body. This method works best for materials like sticks and twigs.
Charming Details
Adding charming details to your snowman can elevate it from simple to spectacular. Small touches can make a big difference, bringing personality and whimsy to your winter creation.
Decorative Elements and Aesthetics
Decorative elements can enhance your snowman’s visual appeal and add a touch of personality. Here’s a table showcasing various elements and their associated aesthetics:
| Element | Aesthetic | Example |
|---|---|---|
| Buttons | Classic, playful | Use a variety of sizes and colors for a whimsical touch. |
| Twigs | Rustic, natural | Create arms, a hat, or a broom handle. |
| Pinecones | Earthy, whimsical | Use as eyes, nose, or hat decorations. |
| Berries | Festive, colorful | Add a touch of color and texture to the snowman’s face or hat. |
Designing a Detailed Snowman
Imagine a snowman with a charmingly mismatched button nose, a jaunty twig hat adorned with a cluster of pinecones, and a bright red berry for a mouth. Its arms could be made of sturdy branches, each holding a small, handmade gift. This whimsical snowman exudes a sense of warmth and joy, inviting passersby to smile.
“Details are not details. They make the design.” – Charles Eames
Snowmen with Personality
Give your snowman a unique personality by incorporating creative decorations and poses. By adding a few simple touches, you can transform your snowman from a simple winter figure into a charming and expressive character.
Creating a Playful Personality, Diy snowman decorations
A playful snowman can bring a smile to anyone’s face. Here are a few ways to create a snowman with a mischievous personality:
- Give it a mischievous grin: Use a few charcoal sticks or black markers to draw a wide, toothy grin on your snowman’s face. This will instantly give your snowman a playful and mischievous expression.
- Add a funny hat: A brightly colored bucket hat or a tilted beanie can add a touch of whimsy to your snowman.
- Give it a playful pose: Position your snowman with one arm raised, as if it’s waving or throwing a snowball. This will give it a playful and dynamic look.
Creating a Friendly Personality
A friendly snowman is welcoming and approachable. Here are a few ways to create a snowman with a warm and friendly personality:
- Give it a warm smile: Use charcoal sticks or black markers to draw a simple, friendly smile on your snowman’s face. This will instantly give your snowman a welcoming and approachable expression.
- Add a friendly accessory: A scarf, a knitted hat, or a pair of mittens can add a touch of warmth and friendliness to your snowman.
- Give it a welcoming pose: Position your snowman with its arms outstretched, as if it’s giving a warm hug. This will create a friendly and inviting presence.
Snowmen in the Landscape

Integrating snowmen into your winter landscape can add a touch of whimsy and charm to your outdoor decor. By thoughtfully positioning your snowman and incorporating natural elements, you can create a scene that feels both festive and harmonious.
Blending Snowmen with Natural Elements
To achieve a seamless blend, consider the following:
- Choose a Natural Setting: Select a spot that complements the snowman’s size and shape. For example, a small snowman might look best nestled among a cluster of bushes, while a larger snowman could stand proudly near a towering tree.
- Incorporate Natural Materials: Utilize branches, pinecones, and rocks to enhance the snowman’s surroundings. For instance, a few strategically placed branches can create a cozy nook for the snowman, while pinecones scattered around the base can add a touch of rustic charm.
- Use Existing Features: Take advantage of existing features in your landscape. A snowman placed near a natural rock formation or a small stream can create a captivating scene.
Designing a Snowman Scene
Here are some ideas for creating a visually appealing snowman scene:
- The Snow Family: Build a small family of snowmen, each with its own unique personality and accessories. You could have a tall, slender father, a round, jolly mother, and a tiny, playful child.
- Snowman in the Forest: Imagine a snowman standing amidst a grove of trees, with a backdrop of snow-covered branches. You could add a few bird feeders to the scene, suggesting a peaceful and tranquil atmosphere.
- Snowman by the River: Place a snowman near a frozen river or stream, with a small wooden bridge nearby. The flowing water and the icy bridge create a sense of movement and wonder.
Tips for Creating a Complementary Snowman
Here are some tips for designing a snowman that complements its surroundings:
- Color Palette: Choose colors for your snowman’s accessories that harmonize with the colors of the natural environment. For example, if you have a lot of red berries in your landscape, consider using red scarves and hats for your snowman.
- Scale: The size of your snowman should be proportionate to its surroundings. A large snowman might look out of place in a small garden, while a small snowman could get lost in a vast, open field.
- Accessories: Use accessories that complement the natural elements of your landscape. For instance, if you have a lot of evergreen trees, consider using pine branches for the snowman’s arms or a pine cone hat.
DIY Snowman Decorations
Transform your home into a winter wonderland with charming DIY snowman decorations. Using everyday materials, you can create a unique and festive atmosphere that captures the spirit of the season.
Materials and Their Uses
| Material | Uses |
|---|---|
| White Cardboard | Base for snowmen, arms, hats |
| Construction Paper | Scarves, hats, buttons, faces |
| Pipe Cleaners | Arms, hats, scarves |
| Felt | Hats, scarves, buttons |
| Markers, Crayons, Paint | Decorating faces, buttons, hats, scarves |
| Googly Eyes | Facial features |
| Glitter | Adding sparkle to decorations |
| Glue, Tape | Securing decorations |
Making Snowman Decorations
Once you’ve gathered your materials, you can start creating your snowman decorations. Here are some step-by-step instructions for making classic snowman accessories:
Scarves
- Cut a strip of construction paper or felt in the desired length and width for your scarf.
- Fold the strip in half lengthwise and cut a fringe along the open edge.
- Glue or tape the ends of the scarf together to form a loop.
- Decorate the scarf with markers, crayons, or glitter if desired.
Hats
- Cut a circle out of construction paper or felt for the hat’s base.
- Cut a strip of construction paper or felt for the hat’s brim.
- Glue or tape the brim to the base of the hat.
- Decorate the hat with markers, crayons, or glitter if desired.
Buttons
- Cut circles out of construction paper or felt in different sizes for the buttons.
- Decorate the buttons with markers, crayons, or glitter if desired.
- Glue or tape the buttons onto the snowman’s body.
Snowman Games and Activities
Snowmen are a fun and festive part of winter, and they can also be the inspiration for some great games and activities for kids of all ages. Whether you’re looking for a fun way to spend an afternoon outdoors or need some indoor entertainment on a snowy day, snowman-themed games and activities are sure to bring smiles to everyone’s faces.
Snowman Scavenger Hunt
A snowman scavenger hunt is a fun way to get kids moving and exploring their surroundings. To create a scavenger hunt, hide clues around your yard or house, each leading to the next clue, and the final clue leading to a special prize or treat.
Here are some ideas for clues:
- “I’m white and round, with a carrot nose, find me and you’ll know.” (This clue could lead to a snowman decoration in the yard.)
- “I’m cold and frosty, but I make you smile, find me and you’ll be there for a while.” (This clue could lead to a snowman-themed picture book.)
- “I’m black and shiny, and I help you see, find me and you’ll be happy as can be.” (This clue could lead to a pair of black buttons, which could be used to make a snowman.)
Snowman Games and Activities
Snowman games and activities can be enjoyed indoors or outdoors, depending on the weather. Here are some ideas for games and activities that can be played with children:
- Snowman Bingo: Create bingo cards with pictures of different snowman accessories, such as hats, scarves, buttons, and sticks. Call out the accessories, and have the children mark them off on their cards. The first person to get five in a row wins!
- Snowman Charades: Have the children act out different snowman-related words or phrases, such as “building a snowman,” “snowball fight,” or “snow angel.”
- Snowman Story Time: Have the children create a story about a snowman. They can tell the story, draw pictures, or even act it out.
- Snowman Crafts: There are many fun snowman crafts that children can make, such as paper plate snowmen, salt dough ornaments, or snowman puppets.
- Snowman Dress-Up: Have the children dress up like snowmen. They can wear white clothes, hats, scarves, and even fake noses and buttons.
Snowman Obstacle Course
An obstacle course can be a fun and challenging way for children to get some exercise. To create a snowman-themed obstacle course, you can use items like:
- Snowballs: Have the children throw snowballs at targets or into buckets.
- Snowman Hula Hoops: Have the children jump through hula hoops that are decorated like snowmen.
- Snowman Tunnels: Create tunnels out of blankets or cardboard boxes and decorate them like snowmen.
- Snowman Relay Races: Divide the children into teams and have them race to complete snowman-themed tasks, such as building a miniature snowman, rolling a snowball down a hill, or decorating a snowman with accessories.
Snowman Photography: Diy Snowman Decorations
Capturing the charm and personality of your snowman creations through photography is a delightful way to preserve the winter memories. Whether it’s a simple, classic snowman or a whimsical, elaborate creation, a well-taken photo can highlight its unique character and beauty.
Lighting Conditions and Backgrounds
The lighting and background play a crucial role in showcasing your snowman’s appeal. Here are some tips for photographing snowmen in different lighting conditions and backgrounds:
- Natural Light: Soft, diffused light, like on a cloudy day or early morning, is ideal for capturing the snowman’s details without harsh shadows. The light will gently illuminate the snowman, bringing out its texture and features.
- Backlighting: Positioning the snowman with the sun behind it can create a stunning silhouette effect, highlighting its form against the bright sky.
- Golden Hour: The hour after sunrise and the hour before sunset, known as the golden hour, offers warm, soft light that can enhance the snowman’s colors and create a magical atmosphere.
- Artificial Light: For evening shots, use a flash or a lamp to illuminate the snowman. Experiment with different angles and distances to create interesting lighting effects.
- Backgrounds: Choose a background that complements the snowman’s design. A snowy field, a backdrop of trees, or even a colorful winter scene can enhance the overall composition.
Snowman Photoshoot Design
To make your snowman photoshoot more engaging, consider incorporating different poses and props:
- Classic Poses: Start with the classic snowman pose, standing tall with a carrot nose and coal eyes.
- Action Shots: Capture the snowman in action, like throwing a snowball, building a snow fort, or even dancing.
- Group Shots: Create a family of snowmen with different sizes and personalities.
- Props: Use props to add personality and whimsy to your snowman. Consider hats, scarves, buttons, twigs for arms, and even small toy animals.
- Perspective: Experiment with different angles and perspectives. Get down low to capture the snowman from a child’s eye view, or climb up high for an overhead shot.
So, gather your supplies, embrace the spirit of creativity, and let your imagination run wild as you embark on a journey to create unforgettable snowman decorations. From the classic snowman to whimsical designs, there’s a perfect creation waiting to be discovered. Enjoy the process, have fun, and let your snowman be a symbol of winter joy and creativity!


